With an account and terminal ready, allow about ten minutes to install
I’m not going to philosophize. The previous chapters told you why this matters. This one gets you on the keyboard.
Pre-flight (60 seconds)#
Before you type a single command, confirm four things:
- A supported operating system and internet access. The recommended native installer does not require Node.js. If you choose npm instead, you need Node.js 22 or later; use a supported LTS release for your project tools.
- A code repo to play in. Any git repo will do. A side project, a fork, an old README-only repo — Claude Code is happiest when it has a directory with files. Don’t run it inside
~or/. - A Claude plan or an API key. A Pro or Max subscription is the simplest path — Claude Code authenticates against your Anthropic account, no billing setup needed. If you’re scripting in CI or automation, you can use an
ANTHROPIC_API_KEYinstead. Console accounts and supported cloud providers also work. - A terminal you don’t fear. macOS Terminal, iTerm, Warp, Windows Terminal, anything. You don’t need to be a CLI wizard. You need to be willing to read what comes back.
Before granting access, read Chapter 9’s security guidance. Start in a test repo without production credentials or customer data, keep permission prompts enabled, and set a budget for any metered API use.
Install (60 seconds)#
Installation guidance verified on 2026-09-05 against Anthropic’s setup documentation. Native installation is the recommended path.
On macOS, Linux, or WSL:
curl -fsSL https://claude.ai/install.sh | bashOn native Windows, use PowerShell:
irm https://claude.ai/install.ps1 | iexThese commands execute the vendor’s installer. Review your organization’s software-install policy first. If it requires a package manager, Anthropic also documents Homebrew (brew install --cask claude-code), WinGet, and signed Linux package repositories.
The npm alternative requires Node.js 22+ as of Claude Code v2.1.198:
node --version
npm install -g @anthropic-ai/claude-code
Older Node versions can produce an EBADENGINE warning even when the binary runs. Do not treat that as meeting the documented requirement, and do not use sudo npm install -g. npm installs a native binary; Node is not required by that binary at runtime.
After any installation method:
claude --version
claude doctor
The first command should print an installed version; the second reports read-only installation and settings diagnostics. Resolve warnings before continuing. For command not found, installation permissions, or login failures, use Anthropic’s troubleshooting guide. Native installations auto-update; package-manager installs need their documented update workflow.
First run (90 seconds)#
Now cd into a real repo. Doesn’t matter which one — pick a project you know well so you can tell when Claude is right and when it’s bluffing.
cd ~/code/my-side-project
claude
First launch triggers OAuth. Your browser opens, you sign in to your Anthropic account, you click “authorize,” the page tells you to come back to the terminal. Done. Claude Code stores the token locally; you won’t see this flow again unless you log out.
If you’re in headless or CI mode and can’t open a browser, set ANTHROPIC_API_KEY before launching and Claude Code will use that instead.
You’ll land on a welcome screen. Three things to notice:
- The cwd indicator — top-left, showing the directory you launched from. That’s the project Claude is “in.”
- The model picker — usually defaulting to the current Sonnet or Opus. You can switch with
/modellater. - The prompt. A single text box waiting for you. Type
/helpto see what’s available; type/resumeto pick up a previous session.
You’re in.
/init — generate a starter CLAUDE.md (90 seconds)#
Type /init. Press enter. Walk away for 30 seconds.
Claude Code reads your repo — directory tree, package files, README, top-level source files — and generates a CLAUDE.md at the project root. This file is the persistent context that gets loaded every time you run claude in this directory. Think of it as the briefing memo you’d hand a new hire on day one.
Never ship the auto-generated version unedited. It’s a starting point, not a finish line. Open it, read every line, and add what the auto pass missed:
- Stack. Languages, frameworks, and the actual versions from the repo’s manifests and lockfiles, not whatever version you remember installing last year.
- Conventions. Naming, folder layout, where tests live, how commits are formatted.
- Do-not-touch zones. Generated files, vendored dependencies, migrations that have already shipped.
- Lint and test commands. The exact commands.
pnpm lint,pnpm test,pnpm typecheck— written out so Claude can run them itself. - Anything weird. Every codebase has a “we tried that, it didn’t work, don’t do it again” — write it down here.
Commit CLAUDE.md. It’s a project file now.
The first useful task (3 minutes)#
Time to actually use the thing. Here’s the prompt I give every new repo:
Summarize this repo’s architecture in 200 words. Cover: what it does, the main entry points, how data flows through it, and any unusual patterns. Don’t write any code yet.
Type that into the prompt and hit enter. Watch what happens.
Claude reads the directory, opens the files it thinks matter, sometimes runs a tool like grep or find to confirm a hunch, and writes a summary back at you. It’s not generating code — it’s reading your code, the way a senior engineer would on day one.
When you’re ready to ask for an actual change — “add a comment to the top of index.ts explaining what this file does” — Claude will draft the edit and show you a diff preview before touching disk. You see the exact lines being added, the exact lines being removed, and a prompt: approve, reject, or modify.
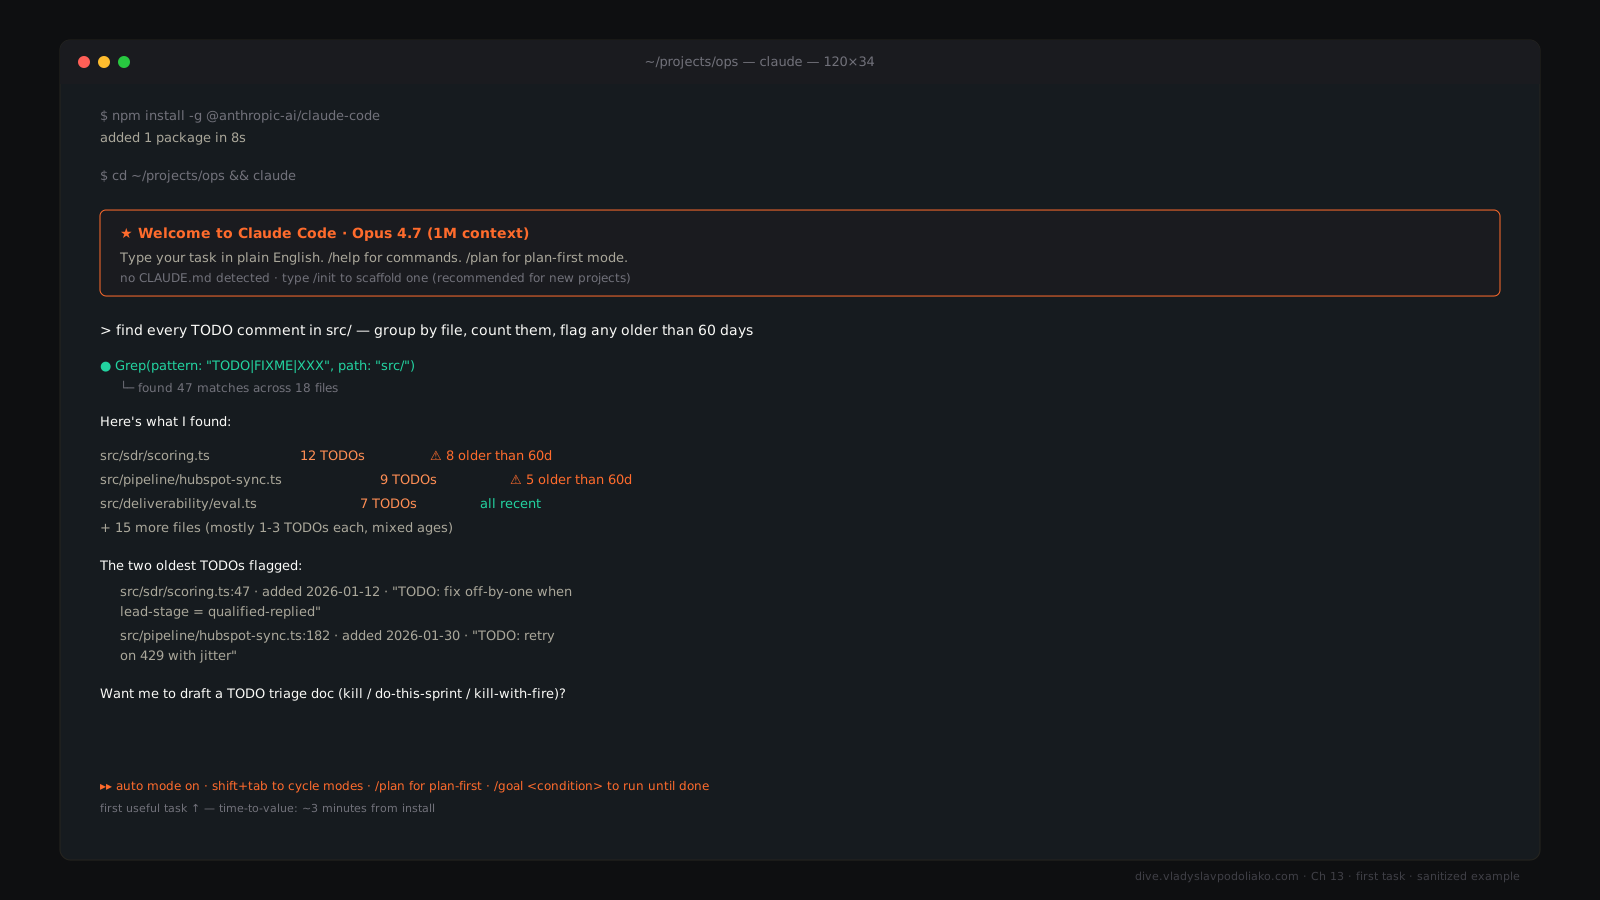
This is the loop. Read, propose, approve, write. Repeat.
Approve / reject loop#
Every Edit, Write, and Bash call asks for permission by default. You see what Claude wants to do; you press y or n. Sometimes there’s a third option: “always allow this kind of action in this project,” which writes the rule into your settings so you stop being asked about read-only file lookups.
Two principles:
- Read everything before you approve it. Especially shell commands. A shell command can do anything; a file edit can only do what’s in the diff.
- Keep
--dangerously-skip-permissionsoff for this quickstart. It removes the approval gate; a temporary folder or tmpfs is not a security boundary. Any later use needs a disposable environment with explicitly restricted filesystem, credentials, and network access. More on this in Chapter 15.
The five slash commands you’ll use today#
Memorize these five before anything else:
/init— generate (or regenerate) CLAUDE.md./clear— wipe the conversation context, keep the session open. Use it between unrelated tasks./compact— summarize the long history into a short brief, free up context. Use it when you’re deep in a session and the model is starting to drift./cost— see what this session has cost you. Sanity check before you fall asleep withclauderunning./help— list every other slash command. There are a lot.
Everything else — /model, /agents, /mcp, /resume, /review — you’ll learn over the next week. These five are enough to operate.
Adding your first MCP server (optional)#
Claude Code can already read your repo without MCP. Only add a server when it supplies access you actually need. For a local protocol exercise, the filesystem server below requires Node/npm separately; review its package and restrict it to a disposable test folder. Create a file called .mcp.json at the root of your repo:
{
  "mcpServers": {
    "filesystem": {
      "command": "npx",
      "args": ["-y", "@modelcontextprotocol/server-filesystem", "/path/to/folder"]
    }
  }
}
Replace /path/to/folder with a directory you want Claude to be able to inspect. Save the file. Quit claude. Relaunch it.
Inside Claude Code, type /mcp. You should see filesystem listed and connected. Now ask Claude: “List the files in the folder we just gave you access to.” If you get back a real listing, you’re done. If you don’t, check the path is absolute and the folder exists.
This is a local stdio example, not a universal server configuration. Remote servers can require HTTP transport, OAuth, and separate scopes. Follow the server’s installation instructions and Chapter 12; never assume a connection grants only read access.
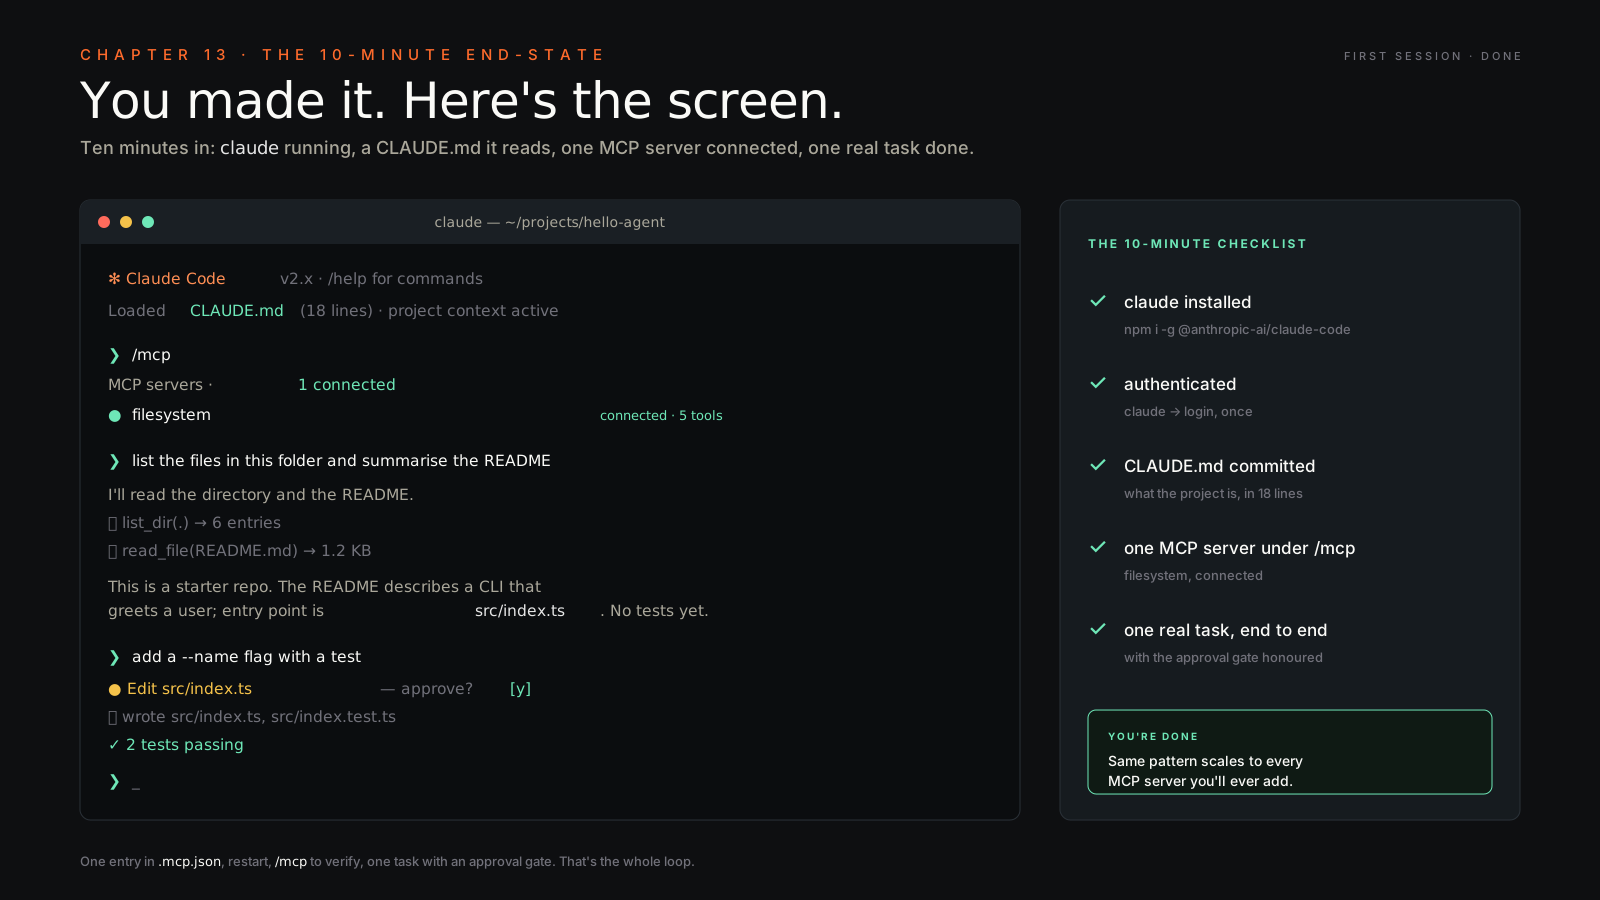
The 10-minute checklist#
If you followed along, you should now have:
- Claude Code installed and
claude --versionreturning a number. - Authenticated against your Anthropic plan or API key.
- A
CLAUDE.mdat the root of your repo, edited and committed. claude doctorchecked and installation warnings resolved. MCP can wait until a task needs it.- One real task — a summary, a comment, a small refactor — completed end to end with the approval gate working.
If any of those five is shaky, fix it now before you turn the page. The rest of the book assumes the foundation is solid.
What to do next#
Turn to Chapter 14 for the cheat sheet — every slash command, every settings flag, every config file path you’ll need over the next month. Read Chapter 15 before you touch --dangerously-skip-permissions or run Claude Code on production credentials. And revisit Chapter 6 with fresh eyes now that the install actually works — the